



How to Install Bushings: Sizing, Pressing & Lubrication Guide
Installing bushings the right way follows a few key rules: removing the old part, thoroughly cleaning the seat, and pressing the new one in with the correct tools.
So how do you correctly measure a bushing to choose the right replacement, and what tools will you need for the job? When pressing in new bushings, it's important not only to use the correct technique but also to prepare the parts properly beforehand. Do you know which grease works best on a bushing before installation, so the process goes smoothly without extra effort? And can silicone grease be used for this purpose, and how would it affect your suspension's service life? In this article, we'll cover the key points that will help you make the bushing replacement process as efficient and safe for your car as possible.
How to Choose the Right Bushing for a Control Arm, Tie Rod, or Any Other Suspension Component
Choosing the right bushings for your car is a critical task that requires attention and know-how. Picking the wrong part can lead to poor suspension performance, reduced ride comfort, and, most importantly, reduced safety. Let's go over the key factors to consider when choosing bushings.
1. Using Your Car's VIN

Benefits of Using the VIN: Your car's VIN (chassis number) is the most reliable way to identify the correct replacement parts. It guarantees that you get a part that exactly matches your vehicle's specifications.
The Selection Process: To find the correct bushing, look it up in a parts catalog or database where you can enter your VIN and get an exact list of compatible parts.
2. Alternative Approach: Cross-Reference Codes and Measurements (Use Only if VIN Lookup Isn't Possible)
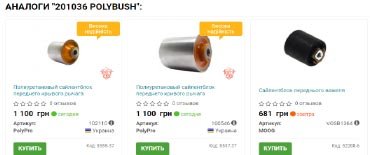
When to Use This: If a VIN lookup isn't possible or doesn't return results, you can fall back on cross-reference part numbers, or select the part based on its physical dimensions.
Pay Attention to the Details: When choosing by size, consider not just the bushing's diameters, but also other parameters such as its height and width, as well as its shape and material.
It's also important to measure the parts before installation, to make sure the suspension (specifically the mounting points) hasn't been deformed, and that the part you received actually fits your vehicle.
How to Measure a Bushing
Before replacing your bushings, it's important to measure them accurately so you can choose components of the right size. Follow this procedure to measure correctly:
Measure the outer diameter of the bushing using calipers or a micrometer.
Record the inner diameter of the metal sleeve inside the bushing.
Determine the overall length of the bushing, including any metal parts.
Be sure to measure the height of the rubber part, if that's relevant for your type of bushing.
- Pay attention to the bushing's shape and design features, as these can vary depending on the car model and manufacturer.
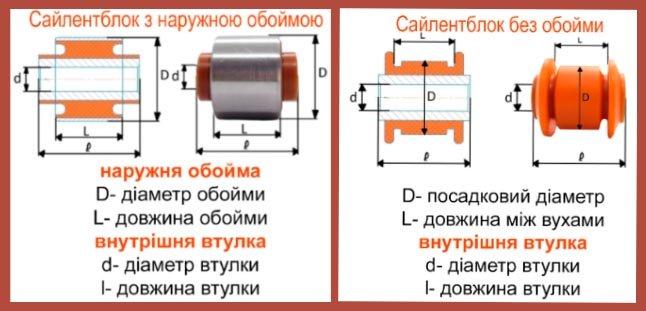
Don't forget to check the car manufacturer's specifications for the bushings, as well as whether universal replacements can be used if the original parts are unavailable or too expensive.
How to Press Bushings the Right Way
Pressing bushings in correctly takes precision and care — installing them wrong can lead to premature wear and worse handling. Before you start, you'll need a dedicated bushing press tool or a bench vise fitted with the right adapters. It's also important to keep the working surfaces clean to avoid dirt and debris getting into the joint.
The pressing method depends on the type of bushing and the car model. For passenger cars, a manual press is often enough, while trucks may need a hydraulic press with more clamping force. The table below compares the two most common bushing pressing methods:
Method |
Manual Press |
Hydraulic Press |
Clamping Force |
Up to 5 tons |
5-30 tons |
Vehicle Type |
Passenger Cars |
Passenger Cars / Trucks |
Installation Accuracy |
High |
Very High |
Once you've picked the right equipment, follow proper safety procedures and wear safety glasses and gloves. Pressing should be done evenly, without jerks or misalignment, so the bushing seats correctly in its housing. It's also important to monitor the installation depth so you don't damage other suspension components.
When pressing in new bushings, it's important to use a press rather than alternatives like a hammer or sledgehammer. The main reason is the risk of damaging the parts. Bushings need precise, evenly distributed pressure during installation. A press delivers the controlled force needed, spreading it evenly across the part's surface and preventing deformation or cracking.
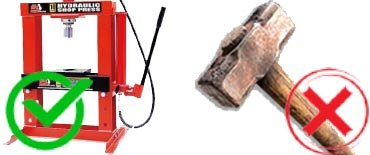
With a hammer or sledgehammer, the force of each blow is concentrated at a single point, which greatly increases the risk of damaging the bushing — especially its edges and internal structure. There's also a high chance of pressing it in unevenly, which can result in an incorrect seat and, in turn, worse suspension performance and a shorter service life for the part. Using a press, then, not only keeps the part safe during installation but also ensures it's installed correctly, preserving the bushing's integrity and function.
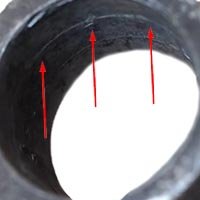
We strongly advise against using mandrels — such as pipes of roughly the same diameter — when installing bushings. The main problem with mandrels is the high risk of damaging the bushing itself. A mandrel often doesn't match the bushing's exact size and shape, which can cause uneven pressure distribution during installation. This not only increases the risk of physical damage to the bushing but can also distort its shape or size, leading to improper suspension function.
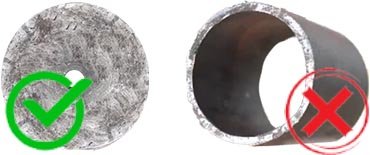
It's important to use specialized equipment and tools designed for installing bushings, to keep the process accurate and safe. Using a mandrel might look like a simple, convenient shortcut, but it actually creates serious risks for the quality and lifespan of the installed parts.
What's the Best Grease for Bushings Before Installation?
Choosing the right grease for bushings is critical for reliable performance and a long service life.
When pressing bushings in, it's especially important to use a purpose-made grease to prevent the metal from tearing or overstretching. Lithium-based greases, graphite grease, or solidol are all good choices — they help spread the pressure evenly and reduce friction during installation. This not only makes the job easier but also significantly lowers the risk of damaging the bushing's metal parts.
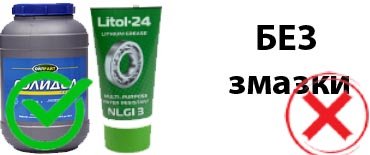
When metal is put under high pressure without proper lubrication, it can easily deform or even tear. The right grease forms a protective layer between metal surfaces, allowing smooth sliding and even pressure distribution. So grease doesn't just make the pressing process more effective — it also plays a key role in preventing mechanical damage and extending the part's service life.
Can You Use Silicone Grease on Bushings?
Using silicone grease to service bushings is a fairly common practice, since silicone has good lubricating properties and doesn't react with most of the materials bushings are made from. That said, it's worth remembering that not every type of bushing needs grease, and in some cases it can even reduce their effectiveness and service life. Before applying any grease, it's always a good idea to check the manufacturer's recommendations for that specific bushing. In short, while silicone grease can be useful for some types of bushings, it should be used carefully and with the specific part in mind. If you're also weighing whether to replace just the bushing or the entire control arm, see our related guide: Control Arm Bushing Replacement vs. Full Arm Replacement.
General Recommendations for Bushing Installation — Summary
Check the Dimensions Before Installation: Be sure to check the seat's inner diameter, the sleeve's inner diameter, the sleeve length, and the bushing's seat diameter and overall length.
Account for Press-Fit Tolerances: A bushing's seat diameter always has some tolerance built in for pressing, so minor differences in size are normal.
Clean the Seat: After pressing out the old bushing, thoroughly clean the seat before installing the new one.
Check the Hole and Bushing Diameters Match: Before installing, confirm that the bushing's diameter matches the seat hole's diameter. If they don't match, consult a specialist.
Grease the Seat: It's recommended to apply grease to the seat before installing the bushing.
Use Washers for Pressing: When pressing in a bushing, use washers of the correct diameter to spread the pressure evenly across the bushing's surface.
Avoid Mandrels: We STRONGLY advise against using mandrels (pipes of roughly the same diameter), since they can damage the bushing.
Pressing Bushings With an Outer Race
Pressing Bushings Without an Outer Race
Get a Free Consultation on Choosing the Right Part:
VIBER

TELEGRAM

IMPORTANT TO KNOW:
- All parts purchased from KAPOT.in.UA should be installed in the corresponding vehicle components and according to the recommendations in the warranty card
- Selecting Parts From the Catalog: All parts should be selected using the VIN, or with the help of a qualified manager
- The Risks of Guessing by Eye: Parts chosen based on their size, or through independent selection, may not match the design and technical specifications required for specific components
Manufacturer Warranty Conditions:
- Parts Selected Outside the Catalog: The manufacturer is not liable under warranty if the parts were selected without using the catalog.
- Instructions Not Followed: If the instructions were not followed during installation or removal, resulting in damage to the parts.
- Part Modifications: Any changes to the design or modifications to the parts will void the warranty.
- Parts can only be returned if they remain complete, with all accompanying purchase documents retained
